2 Ways to Change MAC Address on Windows 10 / 8 / 7
November 11th, 2017 by Leave a reply »MAC address is used to identify a computer on a network, and every network card has a unique MAC address assigned during manufacturing. However, most network cards also allow you to set a custom MAC address from their device properties on Windows. This is useful when you want to test or bypass the MAC filtering settings on firewall or router. Here are 2 simple ways to change MAC address on Windows 10 / 8 / 7.
Method 1: Change MAC Address on Windows 10 / 8 / 7 from Device Manager
- To get started, you need to open Device Manager. Just press Windows key + R on your keyboard and then type devmgmt.msc in the Run dialog box. Hit Enter.

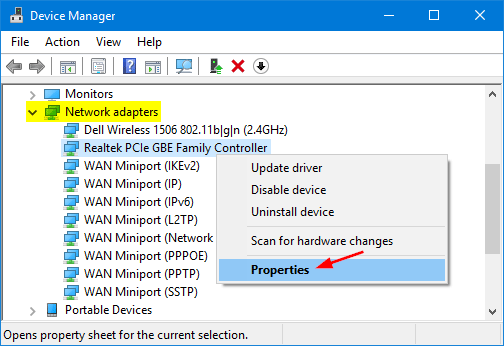
- Expand Network adapters, right-click your Ethernet or Wireless adapter and then select Properties.

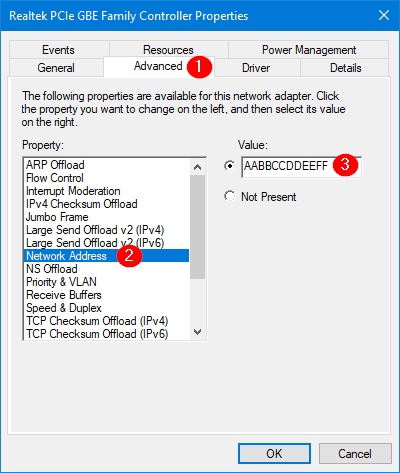
- Click the Advanced tab. Within the Property list, scroll down until you find the “Network Address” or “Locally Administered Address” property. Select the Value radio box and enter your new MAC address.

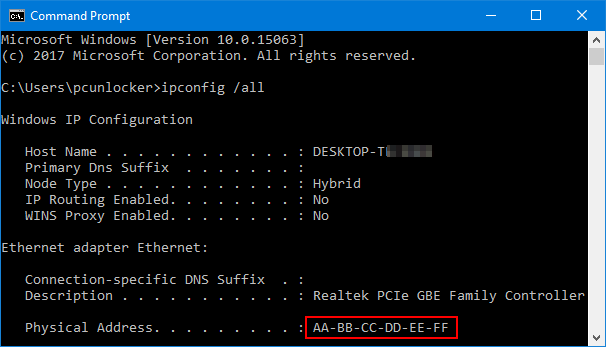
- Click OK to apply. To confirm your change, open the Command Prompt and type ipconfig /all and hit Enter. You should see the new MAC address show up in the line starting with “Physical Address“.

Method 2: Change MAC Address on Windows 10 / 8 / 7 from Registry Editor
- Open the Registry Editor and navigate to the following key:
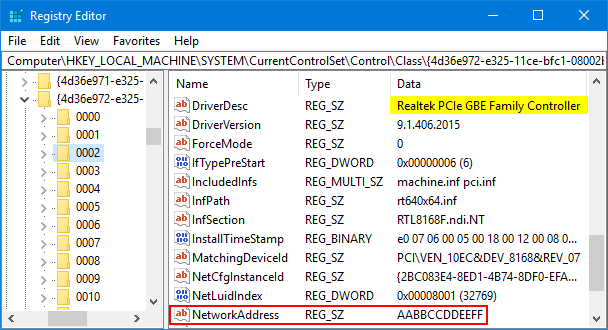
HKEY_LOCAL_MACHINE\SYSTEM\CurrentControlSet\Control\Class\{4D36E972-E325-11CE-BFC1-08002BE10318} - You should see several subkeys with names such as 0000, 0001, etc. You have to click each subkey to check the DriverDesc value that matches with your network card. In my example, I got the key in 002.
- Look for the registry entry NetworkAddress in the right pane, and change the value as your new MAC Address. If that entry doesn’t exist, right-click blank area to create a String value with the name NetworkAddress.

- Close Registry Editor. Disable your network adapter and enable it again. The new Mac address will apply immediately.
没有评论:
发表评论